Content Editor Guide
Welcome to your CMS! This guide helps you understand how content is organised and how to create and manage it effectively.
Table of contents
- Pages
- Content Blocks
- Page Partials
- Website menu
- Variables
- Files
- Translations
- Redirects
- SEO and social sharing
- Media and Assets
- Multilingual content
- Further reading
Pages
Your website is built from Pages. Each page has:
- Title - the main heading displayed on the page.
- Slug - the URL-friendly version of the title (e.g.
about-us). This determines the page’s web address. - Parent page - pages can be nested under other pages to create a hierarchy (e.g.
/services/consulting/). - Body blocks - the content of the page, composed of reusable content blocks (see below).
There are a few special page types:
| Page type | Purpose |
|---|---|
| Home Page | The landing page of your website. There is only one. |
| Page | A regular content page. You can create as many as you need. |
| Not Found Page | Shown when a visitor navigates to a URL that doesn’t exist (404). |
Creating a new page
- Go to Content in the main menu and select the Page model.
- Click + New record.
- Fill in the Title - the slug will be generated automatically.
- Optionally set a Parent page to nest it in the site hierarchy.
- Add content using Body blocks (see the next section).
- Click Save and then Publish when you’re ready to make it live.
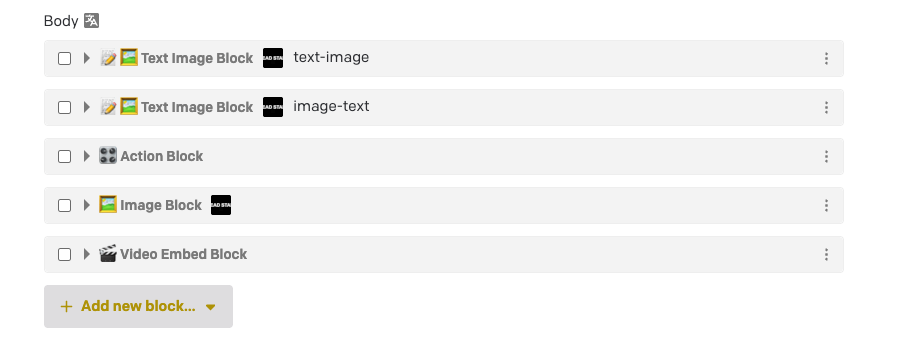
Content Blocks
Pages are built using Content Blocks - modular pieces of content that you can mix and match. Think of them as building blocks: each one serves a specific purpose, and you combine them to compose a full page.
To add a block, click the + button in the body blocks field and choose the type you need.
Available blocks
| Block | What it does |
|---|---|
| Text Block | Rich text content: paragraphs, headings, lists, quotes, and inline media. The most common block for body copy. |
| Image Block | Displays a single image with an optional caption. |
| Text Image Block | Rich text alongside an image, side by side. The image can appear on the left or right. |
| Action Block | One or more buttons or links. Supports internal pages, external URLs, email addresses, and phone numbers. |
| Video Block | Plays a video uploaded directly to the CMS. Supports captions, autoplay, loop, and mute. |
| Video Embed Block | Embeds a video from YouTube or Vimeo using a URL. Use this when the video is hosted externally. |
| Embed Block | Embeds external content from a URL. Works with YouTube, Vimeo, Twitter/X, maps, and other providers. |
| Table Block | Displays data in a table with optional header row and column. |
| List Block | Renders an ordered or unordered list of items, each with rich text content. |
| Grouping Block | Groups multiple blocks together. Choose a layout: stack, accordion, or tabs. |
| Page Partial Block | Reuses a saved Page Partial - a shared set of blocks that can appear on multiple pages. |
| Counter Block | Displays an animated counter that counts up to a target number. |
| Variable Block | Inline block that inserts a reusable Variable (e.g. company name) inside a Text Block. Update the Variable once and it changes everywhere. |
| Icon Block | Inline block that inserts an icon inside a Text Block. |
Inline blocks inside text
Some blocks live inside a paragraph instead of standing on their own. These are called inline blocks, and right now they include the Variable Block and the Icon Block.
To add one while editing a Text Block:
- Place your cursor where you want the variable or icon to appear.
- Open the + menu in the rich text toolbar.
- Pick Variable Block or Icon Block and fill in the details.
The inline block flows with the rest of the sentence, just like a word would.
Tips for working with blocks
- Reorder blocks by dragging them up or down within the body blocks field.
- Duplicate a block to quickly create a similar section without starting from scratch.
- Copy and paste blocks using the inline menu on each block. You can paste them on the same page or on a different page. This also works in bulk by selecting multiple blocks.
- Hover over a block when adding a new one to see a preview image of what it looks like.
- Page Partials are great for content that appears on multiple pages (e.g. a call-to-action or contact section). Edit the partial once, and it updates everywhere.
For more detail, watch the DatoCMS video on working with modular content.
Page Partials
A Page Partial is a saved bundle of blocks that you can reuse on many pages. Think of it like a stencil: build it once, drop it anywhere, and update it in one place when something changes.
Common examples: a “contact us” call-to-action, a newsletter signup, a footer banner, a list of office locations.
To create one:
- Go to Page Partial in the main menu.
- Click + New record and give it a clear Name (e.g. “Newsletter signup”).
- Add blocks the same way you would on a page.
- Save and Publish.
To use it on a page, add a Page Partial Block in the page body and pick the partial you want.
Tip: When you edit a partial, every page that uses it updates automatically. Be aware that a small change can affect many pages.
Website menu
The Website menu (in the main menu of the CMS) is where you manage the navigation of your site, the links that appear in the header.
You can add three types of menu items:
| Menu item type | What it does |
|---|---|
| Menu Item (Internal) | Links to a page on this website. Pick the page from a dropdown. |
| Menu Item (External) | Links to a page on another website. Paste the full URL. |
| Menu Item (Group) | A non-clickable label that acts as a button for its nested items. |
Any of these item types can become a dropdown once you add nested items to it. The difference is that Internal and External items are still clickable links, while a Group only serves as a label to open the dropdown.
To edit the navigation:
- Go to Website in the main menu and open the record.
- In Menu Items, drag items to reorder them, or click + to add a new one.
- Any item can have sub-items underneath it. You can nest up to 3 levels deep.
- Save and Publish when you’re done.
Tip: For internal links, the page title is used automatically. Only fill in the Title field if you want the menu to show something different.
Variables
A Variable is a small piece of text you want to reuse in many places, things like your company name, a phone number, or a price. Set the value once and it updates everywhere that variable is used.
To create or edit a variable:
- Go to Variables in the main menu.
- Click + New record (or open an existing one).
- Fill in:
- Title - a name to recognise it by (e.g. “Company name”).
- Value - the text that will be shown on the website. This can be different per language.
- Save and Publish.
To insert a variable inside a Text Block, see Inline blocks inside text.
Tip: Use variables for anything that might change over time and appears in more than one place. You won’t have to hunt through pages to update it later.
Files
The Files section is for downloadable documents like PDFs, brochures, price lists, or forms. It’s separate from the Media Area: use Media for images and videos, use Files for things visitors will download.
To add a file:
- Go to Files in the main menu.
- Click + New record.
- Upload the file and fill in any details (e.g. title, locale).
- Save and Publish.
Once published, the file becomes available to link to from buttons (Action Block) and rich text.
Translations
The Translations section holds short pieces of text that the website itself uses, things like button labels, error messages, and form hints. These are separate from page content: they’re the words the site shows around your content.
Each translation has:
- Key - the internal name used by the website (e.g.
search_placeholder). Don’t change this unless a developer asks you to. - Value - the text shown to visitors. Fill it in for every active language.
To edit a translation:
- Go to Translations in the main menu.
- Find the entry you want to change (you can search by key).
- Update the Value for each language.
- Save and Publish.
Tip: If you spot a label on the website you’d like to change and it isn’t part of any page content, it’s probably a translation.
Redirects
A Redirect Rule sends visitors from an old URL to a new one. Use this when a page is renamed, moved, or removed, so old links and bookmarks keep working.
To add a redirect:
- Go to Redirect Rule in the main menu and click + New record.
- Fill in:
- From URL - the old address (e.g.
/old-page-slug/). - To URL - the new address (e.g.
/en/new-page-slug/). - Type:
- Permanent redirect (301) - use when the move is final. Browsers remember it.
- Temporary redirect (302) - use when the change might be reversed.
- From URL - the old address (e.g.
- Save and Publish.
Tip: Whenever you rename a page or change its slug, add a redirect from the old URL so visitors and search engines don’t hit a 404.
SEO and social sharing
The SEO and Social Card settings (under Project Settings in DatoCMS) control how your site appears in Google search results and when someone shares a link on social media.
You should fill in:
- Site name - the name of your website.
- Title suffix - text added after each page title in search results (e.g. ”| My Company”).
- Fallback description - a short description used when a page doesn’t have its own.
- Fallback image - the image shown when a page is shared on social media and has no specific image.
Individual pages can override these in their own SEO fields. The global settings are the safety net.
Important: These global settings must be filled in or the site cannot be built.
Media and Assets
All images, videos, and files are managed in the Media Area (accessible from the main menu). From there you can:
- Upload new assets by dragging and dropping files or clicking the upload button.
- Organise assets into folders to keep things tidy.
- Search for assets by filename or metadata.
- Edit metadata - add alt text to images for accessibility, and titles for additional context.
When you add an image or video to a block, you can either upload a new file or pick an existing one from the Media Area.
Tip: Always add descriptive alt text to images. This improves accessibility for visitors using screen readers and helps with SEO.
For more detail, watch the DatoCMS video on intro to the asset area
Multilingual content
Your CMS supports multiple languages. When editing a record, you’ll see a language switcher that lets you toggle between locales. Make sure to fill in content for each active language before publishing.
Further reading
For more detailed guidance, check out these resources from DatoCMS:
- Deep dive into Structured Text - essential video on working with rich text fields.
- Building pages with Modular Content - essential video on composing pages with blocks.
- Content Modelling - understand how models, fields, and blocks are structured (for advanced users).